What you should know first: read Part 6: Run LLMs Locally with Ollama and Part 3: Your First LLM API Calls. You need Node.js 20.6+ or Python 3.10+, and either a free local model in Ollama or an OpenAI API key.
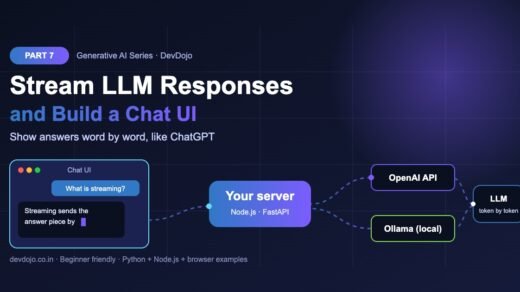
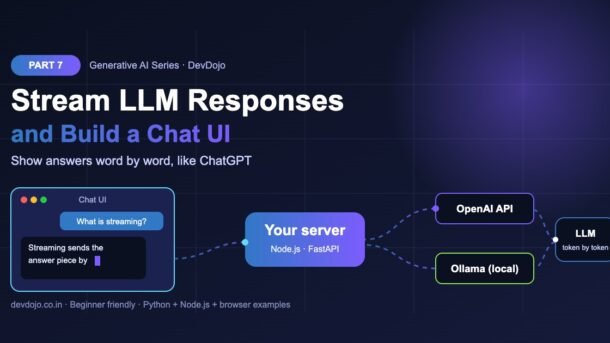
When you ask ChatGPT a question, the answer does not appear all at once. It types itself out, word by word. That trick is called streaming, and it is the single biggest thing that makes an AI app feel fast. In this part you will learn how to stream LLM responses in Python and Node.js, look at the raw Server-Sent Events that travel over the wire, build a terminal chatbot that remembers the conversation and then build a simple chat UI in the browser with a Stop button. Every example works with a free local model through Ollama or with a cloud model such as OpenAI, by changing just one setting.
- Streaming means the model sends its answer in small pieces while it is still writing, instead of one big reply at the end.
- Add
stream: true(orstream=True) to the API call and loop over the events or chunks that come back. - Under the hood the API uses Server-Sent Events: many
data: {…}lines on one open HTTP connection. - For a web app, the server calls the LLM (it keeps the API key) and forwards each piece; the browser reads them with
fetch+getReader(). - The model has no memory, so the app keeps a
messageslist and sends it with every question. - Use an
AbortControllerto stop an answer and save tokens.
Full Generative AI roadmap (30 parts)
Beginner
- What Is Generative AI and How Do LLMs Work?
- Tokens, Context Windows and Model Parameters
- Your First LLM API Calls in Python and Node.js (OpenAI, Anthropic, Gemini)
- Prompt Engineering Basics: Roles, Instructions and Examples
- Temperature, Top-p and Controlling Model Output
- Run LLMs Locally with Ollama
- Streaming Responses and Building a Simple Chat UI You are here
- Structured Outputs: Getting Reliable JSON from LLMs Coming soon
Intermediate
- Embeddings Explained: Turning Text into Vectors Coming soon
- Vector Databases: pgvector, Chroma and Pinecone Coming soon
- RAG Fundamentals: Retrieval-Augmented Generation Coming soon
- Document Loading and Chunking Strategies Coming soon
- Better RAG: Hybrid Search, Re-ranking and Query Rewriting Coming soon
- Function Calling and Tool Use Coming soon
- Conversation Memory and Long Context Management Coming soon
- Multimodal AI: Vision, Images and Audio Inputs Coming soon
- How Image Generation Works: Diffusion Models Basics Coming soon
- LangChain vs LlamaIndex: When to Use a Framework Coming soon
- Testing LLM Apps: Evals, Metrics and Test Sets Coming soon
- Cutting Cost and Latency: Caching, Batching and Model Choice Coming soon
Advanced
- Fine-Tuning vs Prompting vs RAG: Choosing the Right Tool Coming soon
- Fine-Tuning an Open Model with LoRA Coming soon
- Transformers Deep Dive: Attention Explained Simply Coming soon
- Reasoning Models and Thinking Time Coming soon
- Guardrails, Safety and Prompt Injection Defence Coming soon
- Monitoring and Tracing LLM Apps in Production Coming soon
- Serving Open Models: vLLM, Quantization and GPUs Coming soon
- Building a Production GenAI App End to End Coming soon
- Responsible AI: Privacy, Licensing and Bias Coming soon
- Final Project: Build Your Own AI Knowledge Assistant Coming soon
What is streaming?
An LLM writes its answer one token at a time (you learned about tokens in Part 2). In a normal API call, the provider waits until the very last token is ready, then sends the complete answer in one response. With streaming, the provider sends each new token, or a small group of tokens, the moment it exists. Your code receives a stream of tiny pieces and can show them right away.
Think of ordering food. A normal call is like waiting at the counter until the whole meal is packed. Streaming is like a restaurant that serves each dish as soon as it leaves the kitchen: the total time is similar, but you start eating much sooner.
Why stream LLM responses?
The one thing to remember: streaming improves time to first token (how quickly something appears), not the total time. If you need the full answer before doing anything, for example to parse JSON, a normal call is often simpler. We will cover reliable JSON in the next part.
Your first streamed answer in Python and Node.js
Let us start with the cloud example from Part 3 and make it stream. Set up a folder and install the packages first. If you followed Part 3 you already have most of this.
# 1. project folder (Node.js 20.6+ and Python 3.10+)
$ mkdir devdojo-chat && cd devdojo-chat && mkdir public
$ npm init -y && npm pkg set type=module
$ npm install openai
$ pip install openai fastapi uvicorn python-dotenv
# 2a. free and local: make sure Ollama is running (Part 6)
$ ollama pull llama3.2
# 2b. or cloud: put these lines in a .env file instead
# LLM_BASE_URL=https://api.openai.com/v1
# LLM_API_KEY=sk-your-openai-key
# LLM_MODEL=gpt-6-luna
Now the code. Compared with Part 3 there is only one new line, stream: true. Instead of one response object you get an iterator of events. Each event has a type. The two you care about most are response.output_text.delta (a new piece of text in event.delta) and response.completed (the end, with token usage).
# pip install openai python-dotenv
import os
from dotenv import load_dotenv
from openai import OpenAI

load_dotenv()
client = OpenAI()  # reads OPENAI_API_KEY from .env
model = os.getenv("OPENAI_MODEL", "gpt-6-luna")

stream = client.responses.create(
    model=model,
    instructions="You are a friendly coding teacher.",
    input="Explain streaming in one short sentence.",
    stream=True,  # <- the only change from Part 3
)

for event in stream:
    if event.type == "response.output_text.delta":
        print(event.delta, end="", flush=True)  # print each piece now
    elif event.type == "response.completed":
        usage = event.response.usage
print(f"\n[done] tokens out: {usage.output_tokens}")$ python stream_basic.py
Streaming means the model sends its answer in small pieces as soon as they are ready.
[done] tokens out: 18// npm install openai
// run with: node --env-file=.env stream-basic.mjs
import OpenAI from "openai";
const client = new OpenAI(); // reads OPENAI_API_KEY
const model = process.env.OPENAI_MODEL ?? "gpt-6-luna";
const stream = await client.responses.create({
model,
instructions: "You are a friendly coding teacher.",
input: "Explain streaming in one short sentence.",
stream: true, // <- the only change from Part 3
});
for await (const event of stream) {
if (event.type === "response.output_text.delta") {
process.stdout.write(event.delta); // print each piece now
} else if (event.type === "response.completed") {
console.log(`\n[done] tokens out: ${event.response.usage.output_tokens}`);
}
}$ node --env-file=.env stream-basic.mjs
Streaming means the model sends its answer in small pieces as soon as they are ready.
[done] tokens out: 18Switch between the Python and Node.js tabs and click ▶ Run to see what prints. In your terminal the sentence appears a few words at a time.
Two small details make it look right in a terminal. In Python, print(..., end="", flush=True) prints the piece without a new line and pushes it to the screen immediately. In Node.js, process.stdout.write() does the same. Without them the text would appear in big jumps or all at the end.
What travels over the wire: Server-Sent Events
SDKs hide the details, but it helps to see the raw stream once. LLM APIs use a simple web standard called Server-Sent Events (SSE). The server keeps one HTTP response open and writes lines that start with data:, each followed by a blank line. Ollama speaks the same OpenAI-compatible format, so you can try it locally with curl:
# -N turns off curl's buffering so you see chunks as they arrive
curl -N http://localhost:11434/v1/chat/completions \
  -H "Content-Type: application/json" \
  -d '{"model":"llama3.2","stream":true,
"messages":[{"role":"user","content":"Say hi"}]}'$ bash raw_stream.sh
data: {"id":"chatcmpl-…","object":"chat.completion.chunk","choices":[{"index":0,"delta":{"role":"assistant","content":"Hi"},"finish_reason":null}]}
data: {"id":"chatcmpl-…","object":"chat.completion.chunk","choices":[{"index":0,"delta":{"role":"assistant","content":" there"},"finish_reason":null}]}
data: {"id":"chatcmpl-…","object":"chat.completion.chunk","choices":[{"index":0,"delta":{"role":"assistant","content":"!"},"finish_reason":null}]}
data: {"id":"chatcmpl-…","object":"chat.completion.chunk","choices":[{"index":0,"delta":{"role":"assistant","content":""},"finish_reason":"stop"}]}
data: [DONE]Click ▶ Run to see the raw stream. Every data: line is one small JSON chunk, and [DONE] marks the end.
Each chunk carries a delta: only the new text, not the whole answer so far. Your job is to join the deltas together. The last chunk has a finish_reason such as "stop" (finished normally) or "length" (hit the token limit), and [DONE] closes the stream.
The openai package gives you two styles of streaming. The newer Responses API (client.responses.create) sends named events, as you saw above. The older Chat Completions API (client.chat.completions.create) sends the chat.completion.chunk objects shown here. For the rest of this post we use Chat Completions, because Ollama, LM Studio, vLLM, Groq and many other providers support that exact format. One codebase then works with local and cloud models.
A terminal chatbot with memory
A chatbot is a loop: read the question, stream the answer, repeat. The only tricky part is memory. The model forgets everything between calls, so we keep a messages list and send the whole list every time. After the stream ends, we add the assistant’s full reply to the list.
# A terminal chatbot that streams answers and remembers the conversation.
# Works with Ollama (default) or any OpenAI-compatible API.
import os
from openai import OpenAI

client = OpenAI(
    base_url=os.getenv("LLM_BASE_URL", "http://localhost:11434/v1"),
    api_key=os.getenv("LLM_API_KEY", "ollama"),  # Ollama ignores the key
)
MODEL = os.getenv("LLM_MODEL", "llama3.2")

messages = [{"role": "system", "content": "You are a helpful, concise assistant."}]

while True:
    user_text = input("\nYou: ").strip()
    if user_text.lower() in {"exit", "quit"}:
        break
    messages.append({"role": "user", "content": user_text})

    print("AI: ", end="", flush=True)
    reply = ""
    stream = client.chat.completions.create(
        model=MODEL, messages=messages, stream=True
    )
    for chunk in stream:
        if not chunk.choices:
            continue
        piece = chunk.choices[0].delta.content or ""
        reply += piece
        print(piece, end="", flush=True)

    # save the full answer so the next question has context
    messages.append({"role": "assistant", "content": reply})
print()$ python chat_cli.py
You: What is Node.js in one line?
AI: Node.js is a runtime that lets you run JavaScript outside the browser.
You: And who made it?
AI: Node.js was created by Ryan Dahl in 2009.
You: exitClick ▶ Run. Notice that the second question (“And who made it?”) works only because the history is sent again.
By default this talks to Ollama on your own computer (http://localhost:11434/v1). To use OpenAI instead, set LLM_BASE_URL, LLM_API_KEY and LLM_MODEL as shown in the setup block. Nothing else changes. Also notice if not chunk.choices: continue: some providers send a final chunk with usage numbers and no choices, and this line stops it from crashing your loop.
Build a simple chat UI in the browser
Now the fun part: a real chat page with bubbles that fill up word by word. We need two pieces. A tiny server that holds the API key, calls the LLM with streaming and writes each piece into the HTTP response. And a single HTML page that sends the conversation and reads the response as a stream.
The server below uses only Node.js built-ins plus the openai package, so there is no framework to learn. Read the comments, then switch to the public/index.html tab.
// Tiny chat server: node --env-file=.env server.mjs  ->  http://localhost:3000
import http from "node:http";
import { readFile } from "node:fs/promises";
import OpenAI from "openai";

const client = new OpenAI({
  baseURL: process.env.LLM_BASE_URL ?? "http://localhost:11434/v1",
  apiKey: process.env.LLM_API_KEY ?? "ollama",
});
const MODEL = process.env.LLM_MODEL ?? "llama3.2";
const MAX_MESSAGES = 20; // keep the history (and the bill) small

const server = http.createServer(async (req, res) => {
  if (req.method === "GET" && req.url === "/") {
    res.writeHead(200, { "Content-Type": "text/html; charset=utf-8" });
    return res.end(await readFile("public/index.html"));
  }
  if (req.method === "POST" && req.url === "/api/chat") {
    let body = "";
    for await (const part of req) body += part;
    const { messages = [] } = JSON.parse(body || "{}");

    res.writeHead(200, {
      "Content-Type": "text/plain; charset=utf-8",
      "Cache-Control": "no-cache",
      "X-Accel-Buffering": "no", // stop Nginx from buffering the stream
    });

    const controller = new AbortController();
    res.on("close", () => controller.abort()); // user left or pressed Stop

    try {
      const stream = await client.chat.completions.create(
        {
          model: MODEL,
          stream: true,
          messages: [
            { role: "system", content: "You are a friendly coding teacher." },
            ...messages.slice(-MAX_MESSAGES),
          ],
        },
        { signal: controller.signal }
      );
      for await (const chunk of stream) {
        res.write(chunk.choices[0]?.delta?.content ?? "");
      }
    } catch (err) {
      if (!controller.signal.aborted) res.write("\n[error] " + err.message);
    }
    return res.end();
  }
  res.writeHead(404).end("Not found");
});

server.listen(3000, () => console.log("Chat UI on http://localhost:3000"));$ node --env-file=.env server.mjs
Chat UI on http://localhost:3000<!doctype html>
<html lang="en">
<head>
<meta charset="utf-8">
<title>DevDojo Chat</title>
<style>
body { font-family: system-ui; max-width: 640px; margin: 40px auto; }
#log p { padding: 10px 14px; border-radius: 12px; white-space: pre-wrap; }
.user { background: #e8f0ff; margin-left: 20%; }
.ai { background: #f2f2f2; margin-right: 20%; }
</style>
</head>
<body>
<h1>DevDojo Chat</h1>
<div id="log"></div>
<form id="form">
<input id="text" placeholder="Ask anything..." autocomplete="off" required>
<button id="send">Send</button>
<button id="stop" type="button" disabled>Stop</button>
</form>
<script>
const messages = []; // the whole conversation lives here
const log = document.getElementById("log");
let controller = null;
function addBubble(role, text) {
const p = document.createElement("p");
p.className = role === "user" ? "user" : "ai";
p.textContent = text;
log.append(p);
return p;
}
document.getElementById("form").onsubmit = async (e) => {
e.preventDefault();
const input = document.getElementById("text");
messages.push({ role: "user", content: input.value });
addBubble("user", input.value);
input.value = "";
const bubble = addBubble("assistant", "");
controller = new AbortController();
stop.disabled = false;
try {
const res = await fetch("/api/chat", {
method: "POST",
headers: { "Content-Type": "application/json" },
body: JSON.stringify({ messages }),
signal: controller.signal,
});
const reader = res.body.getReader();
const decoder = new TextDecoder();
while (true) {
const { done, value } = await reader.read();
if (done) break;
bubble.textContent += decoder.decode(value, { stream: true });
}
} catch (err) {
if (err.name !== "AbortError") bubble.textContent += " [error]";
}
messages.push({ role: "assistant", content: bubble.textContent });
stop.disabled = true;
};
const stop = document.getElementById("stop");
stop.onclick = () => controller?.abort(); // cancel the answer
</script>
</body>
</html>Two files: click the server.mjs and public/index.html tabs. Click ▶ Run on the server tab, then open http://localhost:3000 in your browser.
How the browser reads the stream
The key lines are in the page’s <script>. A normal fetch call would use await res.json(), which waits for the whole body. Instead we call res.body.getReader(). Each reader.read() returns the next bytes as soon as they arrive, and TextDecoder turns bytes into text. The { stream: true } option on decode matters: a Hindi or emoji character can be split across two chunks, and this option keeps the half-character until the rest arrives.
The server sends plain text rather than SSE. That keeps the browser code tiny, because we do not need to parse data: lines. SSE is great when you need events with names (for example “tool started”), but for a basic chat, plain text streaming is enough. If you want to understand readable streams deeper, MDN has an excellent guide on using readable streams.
Open the step explorer below to follow one answer from the Send button to the screen.
The browser sends the conversation. When you press Send, the page posts the full messages array (every earlier question and answer) to /api/chat. LLMs have no memory of their own, so history must travel with every request.
The model generates token by token. With stream: true the provider does not wait for the end. Each time it has a few new tokens it sends a small chunk over the same open HTTP connection, formatted as Server-Sent Events (data: {…} lines).
Your server passes pieces along. The SDK turns those chunks into a loop. For every chunk the server pulls out delta.content and calls res.write() (Node.js) or yield (FastAPI). The API key never leaves the server.
The browser paints each piece. res.body.getReader() gives the page bytes as they arrive. TextDecoder turns them into text and the code appends it to the reply bubble. When the loop ends, the full reply is saved in messages.
The same chat server in Python with FastAPI
Prefer Python? FastAPI has StreamingResponse, which takes a generator. Every yield sends one piece to the browser. We use AsyncOpenAI so the server can handle many chats at the same time without blocking. The HTML page stays exactly the same.
# pip install fastapi uvicorn openai
# run with: uvicorn main:app --reload
import os
from fastapi import FastAPI
from fastapi.responses import FileResponse, StreamingResponse
from openai import AsyncOpenAI
from pydantic import BaseModel

client = AsyncOpenAI(
    base_url=os.getenv("LLM_BASE_URL", "http://localhost:11434/v1"),
    api_key=os.getenv("LLM_API_KEY", "ollama"),
)
MODEL = os.getenv("LLM_MODEL", "llama3.2")
app = FastAPI()


class ChatRequest(BaseModel):
    messages: list[dict]


@app.get("/")
async def home():
    return FileResponse("public/index.html")  # same page as the Node.js version


@app.post("/api/chat")
async def chat(req: ChatRequest):
    async def generate():
        stream = await client.chat.completions.create(
            model=MODEL,
            stream=True,
            messages=[{"role": "system", "content": "You are a friendly coding teacher."}]
            + req.messages[-20:],
        )
        async for chunk in stream:
            if chunk.choices and chunk.choices[0].delta.content:
                yield chunk.choices[0].delta.content

    return StreamingResponse(
        generate(),
        media_type="text/plain; charset=utf-8",
        headers={"Cache-Control": "no-cache", "X-Accel-Buffering": "no"},
)$ uvicorn main:app --port 3000
INFO: Started server process […]
INFO: Waiting for application startup.
INFO: Application startup complete.
INFO: Uvicorn running on http://127.0.0.1:3000 (Press CTRL+C to quit)Click ▶ Run. The FastAPI server serves the exact same public/index.html, so the browser code does not change.
If you are new to FastAPI, our FastAPI tutorial explains routes, Pydantic models and Uvicorn step by step.
Stopping an answer with a Stop button
Long answers cost money and time, so a Stop button is a must. Our page already has one. Here is the chain of events when you click it:
controller.abort() cancels the fetch.res.on("close") fires and aborts the LLM request.The text that already arrived stays in the bubble and is still saved to messages, so the conversation keeps going naturally. In FastAPI, Starlette stops the generator when the client disconnects, which also closes the upstream stream.
Common errors and fixes
| Problem | Why it happens | Fix |
|---|---|---|
| Text appears all at once at the end | Output is buffered by Python’s print, a proxy (Nginx) or a compression middleware | Use flush=True; send X-Accel-Buffering: no; turn off gzip for the stream route |
TypeError: 'Stream' object is not subscriptable / .choices is undefined | You treated a stream like a normal response | Loop over it with for / for await; read delta, not message |
IndexError on chunk.choices[0] | Some providers send a final usage chunk with an empty choices list | Skip chunks without choices (if not chunk.choices: continue or ?. in JS) |
| The bot forgets the last question | Only the newest message was sent | Send the whole messages list and append the assistant reply after the stream ends |
Strange � characters in Hindi or emoji text | A multi-byte character was split across chunks | Use one TextDecoder and call decode(value, { stream: true }) |
JSON.parse fails when reading SSE yourself | A network chunk can end in the middle of a data: line | Buffer text and only parse complete lines that end with a blank line, or use the SDK |
ECONNREFUSED 127.0.0.1:11434 | Ollama is not running | Start the Ollama app or run ollama serve, then ollama pull llama3.2 |
| 401 Unauthorized | Wrong or missing API key for a cloud provider | Check LLM_API_KEY in .env and start Node.js with --env-file=.env |
Best practices for streaming chat apps
- Keep secrets on the server. The browser talks to your API route; your route talks to the LLM.
- Use
textContent, notinnerHTML, when you show model output. Model text can contain HTML, and inserting it raw opens the door to XSS attacks. - Limit the history (for example the last 20 messages) and set
max_tokensormax_output_tokensso one chat cannot burn your budget. - Always offer Stop and abort the upstream request when the client disconnects.
- Show a typing hint (a blinking cursor or “…”) until the first piece arrives, so users know something is happening.
- Handle errors inside the stream. Once you have sent a 200 status you cannot change it, so write a short error message into the stream, as our server does.
- Turn off buffering in proxies and hosting platforms, and test the deployed app, not just localhost.
- Render Markdown later. Models often reply in Markdown. Once the basics work, render it with a safe Markdown library that sanitises HTML.
Practice task
Upgrade your chat app. Using the code from this post:
- Add a “New chat” button that clears the
messagesarray and the screen. - Show a blinking ▍ cursor at the end of the AI bubble while the answer is streaming, and remove it when the stream ends.
- Measure time to first token: record
performance.now()beforefetchand when the first piece arrives, and show it under the bubble (for example “first words in 420 ms”). - Bonus: try the same question with a local Ollama model and a cloud model by changing only
.env. Which one starts faster on your machine?
Frequently asked questions
Does streaming make the LLM answer faster?
No, the total generation time is about the same. Streaming shows the first words much sooner, so the app feels faster and users can start reading immediately.
Does streaming cost more tokens or money?
No. You pay for the same input and output tokens. You can even save money, because a Stop button ends generation early.
What is the difference between SSE and WebSockets?
SSE is one-way: the server pushes text to the client over a normal HTTP response. WebSockets are two-way and need a separate protocol. LLM APIs use SSE because the answer only flows one way, and it works with ordinary HTTP tools.
Can I stream with Ollama and local models?
Yes. Ollama streams by default on its own API and also supports stream: true on its OpenAI-compatible endpoint, which is why the same code works locally and in the cloud.
Why use fetch instead of the browser’s EventSource?
EventSource only supports GET requests, but a chat must POST the conversation history. fetch with getReader() supports POST, custom headers and cancelling with AbortController.
How do I stream in React or Next.js?
The same idea works: keep the reply in state and append each piece as it arrives. We will build streaming UIs in the React and Next.js series, and libraries such as the Vercel AI SDK can handle the plumbing for you.
Conclusion
You now know how to stream LLM responses end to end: turn on stream: true, loop over events or chunks, join the deltas, and forward them from a small server to a browser that reads the response with getReader(). You built a terminal chatbot and a simple chat UI with memory and a Stop button, and the same code works with a free local model in Ollama or with a cloud model. This is the foundation of almost every AI chat product you use.
Missed the previous part? Read Part 6: Run LLMs Locally with Ollama. Want to build something bigger? Our RAG tutorial with Python and pgvector shows how to chat with your own documents.
New posts every day on DevDojo
Follow the full Generative AI series – 30 parts from “what is an LLM” to building a production AI assistant. Bookmark devdojo.co.in and share a screenshot of your chat app in the comments.