What you should know first: read Node.js Part 1: What Is Node.js and Node.js Part 2: Modules in Node.js. You should know how to run a file with node file.js and how import / export work.
In Part 2 you split your own code into modules. But most code in a real Node.js app is not written by you. Date formatting, web frameworks, database drivers, testing tools: someone has already built them and shared them for free. npm and package.json are how you find, install and manage that shared code. In this part you will learn, step by step, what npm is, what every important line of package.json means, how to install and remove packages, what the strange ^ and ~ symbols in version numbers mean, why package-lock.json exists, and how to run your project with npm scripts.
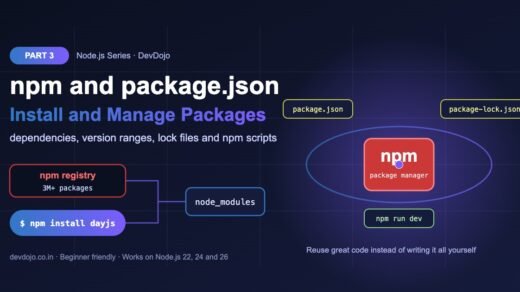
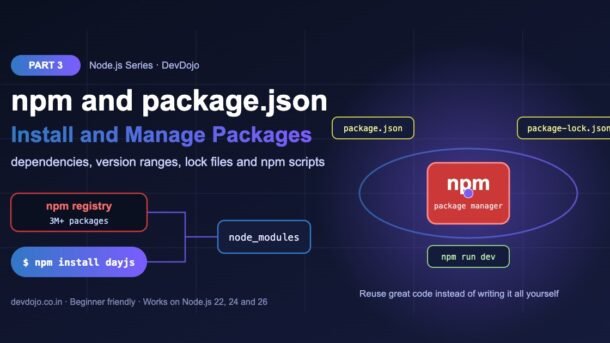
- npm is the package manager that comes with Node.js. It downloads packages from the npm registry, a huge online library of free JavaScript code.
- package.json is your project’s ID card: name, version, scripts and the list of packages your project needs.
npm install nameadds a package to dependencies;npm install -D nameadds a development-only tool to devDependencies.- Versions follow MAJOR.MINOR.PATCH.
^1.11.0allows minor and patch updates;~1.11.0allows only patch updates. - package-lock.json records the exact versions installed. Commit it, and use
npm cion servers and in CI for identical installs. - npm scripts (
npm start,npm run dev,npm test) give every project the same simple commands.
Full Node.js roadmap (30 parts)
Beginner
- What Is Node.js and How to Build Your First Node.js App
- Modules in Node.js: ES Modules, CommonJS and import/export
- npm and package.json: Installing and Managing Packages You are here
- Working with Files and Folders: the fs and path Modules Coming soon
- Asynchronous Node.js: Callbacks, Promises and async/await Coming soon
- The Event Loop Explained Simply Coming soon
- Events and EventEmitter: Building Event-Driven Code Coming soon
- Streams and Buffers: Handling Large Data Efficiently Coming soon
- Building a Web Server with the http Module Coming soon
- Mini Project: Build a Command-Line Tool with Node.js Coming soon
Intermediate
- Express.js Basics: Routes, Requests and Responses Coming soon
- Middleware in Express: How Requests Flow Coming soon
- Build a REST API with Express: Full CRUD Coming soon
- Validating Request Data with Zod Coming soon
- Environment Variables and Configuration (–env-file and .env) Coming soon
- Connecting Node.js to PostgreSQL Coming soon
- Using an ORM: Prisma vs Drizzle Coming soon
- MongoDB with Mongoose Coming soon
- Authentication: Password Hashing, Sessions and JWT Coming soon
- Error Handling and Logging with Pino Coming soon
Advanced
- Testing Node.js Apps with node:test and Supertest Coming soon
- TypeScript with Node.js: Running .ts Files Directly Coming soon
- File Uploads and Image Processing Coming soon
- Real-Time Apps with WebSockets and Socket.IO Coming soon
- Caching with Redis Coming soon
- Background Jobs and Queues with BullMQ Coming soon
- Worker Threads and Clustering for Performance Coming soon
- Security Best Practices for Node.js APIs Coming soon
- Debugging, Profiling and Performance Tuning Coming soon
- Final Project: Build and Deploy a Production-Ready Node.js API Coming soon
What is npm?
npm (short for Node Package Manager) is installed automatically with Node.js. The word “npm” is used for three connected things:
registry.npmjs.org with millions of packages that anyone can download.npm command in your terminal. It installs, updates and removes packages and runs scripts.A package is simply a folder of code with its own package.json. When you install one, you can import it exactly like the modules you wrote in Part 2. Check that npm is ready:
# npm comes with Node.js, so both commands should print a version
$ node -v
v22.23.4
$ npm -v
10.9.9
Your numbers may be higher, and that is fine. Everything in this tutorial works with the npm version that ships with Node.js 22, 24 or 26.
Create a package.json file
Every Node.js project starts with a package.json file in its main folder. You can write it by hand, but the quickest way is npm init. The -y flag answers “yes” to every question and uses default values.
# create a new project folder and a package.json inside it
$ mkdir my-first-npm-app
$ cd my-first-npm-app
$ npm init -y
Wrote to /home/you/my-first-npm-app/package.json:{
"name": "my-first-npm-app",
"version": "1.0.0",
"description": "",
"main": "index.js",
"scripts": {
"test": "echo \"Error: no test specified\" && exit 1"
},
"keywords": [],
"author": "",
"license": "ISC"
}This is the file npm init -y created. Hover a line to highlight it.
Two quick improvements you will want in almost every new project: switch to ES modules and add a description. You can edit the file in your editor or use the npm pkg command, which edits package.json safely for you:
$ npm pkg set type=module
$ npm pkg set description="My first app with npm packages"
$ npm pkg get type
"module"
package.json fields explained
You do not need to memorise every field. These are the ones you will use every week. Click the tabs to explore them:
name and version identify your project. The name must be lowercase with no spaces (use dashes). The version follows MAJOR.MINOR.PATCH, for example 1.0.0. description, keywords, author and license are extra information, mostly useful if you publish the package. "private": true stops you from publishing an app to npm by mistake.
"type": "module" tells Node.js that .js files in this project are ES modules, so you can use import and export (you learned this in Part 2). engines documents which Node.js versions your app supports, for example "node": ">=22". main is the entry file for people who import your package; for an app you can remove it.
scripts are named shortcuts for commands. "start": "node app.js" lets anyone run npm start without knowing which file to open. Scripts can use tools installed in node_modules/.bin without a global install.
dependencies are packages your app needs to run (for example dayjs, express). devDependencies are tools you need only while developing (test runners, linters, TypeScript). Each entry is a package name plus a version range such as "^1.11.23".
The full list of fields is in the official npm package.json documentation.
Installing your first npm package
Let us install dayjs, a tiny and popular library for working with dates. Run this inside your project folder:
$ npm install dayjs

added 1 package, and audited 2 packages in 459ms

found 0 vulnerabilities
npm install command does three things: downloads the code into node_modules, adds the package to package.json, and writes the exact version to package-lock.json.Now use the package. Because dayjs lives in node_modules, you import it by its package name, with no ./ and no file extension. That is how Node.js knows to look in node_modules instead of your own files.
// app.js – use an npm package like any other module
import dayjs from "dayjs";

const launch = dayjs("2026-12-25");
const today = dayjs("2026-11-06");

console.log("Launch date:", launch.format("DD MMM YYYY"));
console.log("Days to go:", launch.diff(today, "day"));
console.log("One week later:", today.add(7, "day").format("dddd, D MMMM"));$ node app.js
Launch date: 25 Dec 2026
Days to go: 49
One week later: Friday, 13 NovemberClick ▶ Run to see the real output.
npm install has a short form, npm i. Both do exactly the same thing. You can also install several packages at once: npm i dayjs zod.node_modules. It can contain thousands of files and is always re-created by npm install. Add it to your .gitignore file.dependencies vs devDependencies
Some packages are part of your running app. Others only help you while you write code. npm keeps them in two separate lists:
| dependencies | devDependencies | |
|---|---|---|
| Install command | npm install dayjs | npm install -D semver (or --save-dev) |
| Used for | Code your app needs to run | Tools for building, testing and checking code |
| Examples | express, dayjs, zod, pg | typescript, eslint, prettier, vitest |
| Installed in production? | Yes | No, when you use npm ci --omit=dev |
For this tutorial we install semver (the same version-checking library that npm itself uses) as a dev dependency, because we only need it to experiment:
$ npm install -D semver
added 1 package, and audited 3 packages in 402ms

found 0 vulnerabilities
Version numbers and ranges (^ and ~)
Look at package.json after installing and you will see "dayjs": "^1.11.23". That little ^ is a version range. npm packages use semantic versioning (semver): MAJOR.MINOR.PATCH.
^ (npm’s default) allows new features and fixes; the tilde ~ allows only bug fixes.Seeing is believing. This small script uses the semver package to check which versions each range accepts:
// versions.js – see which versions a range accepts
import semver from "semver";

const ranges = ["^1.11.0", "~1.11.0", "1.11.0", ">=1.10.0 <2.0.0"];
const versions = ["1.11.0", "1.11.23", "1.12.0", "2.0.0"];

for (const range of ranges) {
  const ok = versions.filter((v) => semver.satisfies(v, range));
  console.log(range.padEnd(16), "->", ok.join(", "));
}$ npm run versions
> my-first-npm-app@1.0.0 versions
> node versions.js
^1.11.0 -> 1.11.0, 1.11.23, 1.12.0
~1.11.0 -> 1.11.0, 1.11.23
1.11.0 -> 1.11.0
>=1.10.0 <2.0.0 -> 1.11.0, 1.11.23, 1.12.0Click ▶ Run to see which versions every range allows (real output).
| Range | Meaning in simple words | When to use |
|---|---|---|
^1.11.0 | Any 1.x.x version from 1.11.0 up | Default. Good for most packages. |
~1.11.0 | Only 1.11.x bug-fix versions | When a package sometimes breaks things in minor updates. |
1.11.0 | Exactly this version | When you need full control (npm i dayjs --save-exact). |
* or latest | Any version at all | Avoid in real projects. |
^0.4.2 only allows 0.4.x, because in the 0.x stage every minor update may break things. Learn more at semver.org.package-lock.json and npm ci
If package.json says ^1.11.23, then today you may get 1.11.23 and next month your teammate may get 1.12.0. To avoid “it works on my machine” bugs, npm writes package-lock.json: the exact version, download URL and integrity hash of every installed package, including the packages that your packages depend on.
{
  "name": "my-first-npm-app",
  "version": "1.0.0",
  "lockfileVersion": 3,
  "requires": true,
  "packages": {
    "node_modules/dayjs": {
      "version": "1.11.23",
      "resolved": "https://registry.npmjs.org/dayjs/-/dayjs-1.11.23.tgz",
      "integrity": "sha512-QDTCU0M0MxR3hQfnlDJfwekQiaanm1ubOD231u73WBckQ/...",
      "license": "MIT"
    },
    "node_modules/semver": {
      "version": "7.8.6",
      "dev": true,
      "license": "ISC"
    }
  }
}A shortened view of the real lock file. The integrity hash is cut for space.
- Always commit
package-lock.jsonto Git. Never edit it by hand. npm installmay update the lock file whenpackage.jsonchanges.npm ci(“clean install”) deletesnode_modulesand installs exactly what the lock file says. It fails if the two files do not match. Use it in CI pipelines and on servers. Our GitHub Actions CI/CD for Node.js guide uses it in every workflow.
# fresh, exact install from package-lock.json
$ npm ci
added 2 packages, and audited 3 packages in 475ms

found 0 vulnerabilities
# production server: skip devDependencies
$ npm ci --omit=dev
npm scripts: start, dev and test
Instead of remembering long commands, put them in the "scripts" section of package.json. Here is our finished file with four scripts:
{
  "name": "my-first-npm-app",
  "version": "1.0.0",
  "description": "",
  "scripts": {
    "test": "node --test",
    "start": "node app.js",
    "dev": "node --watch app.js",
    "versions": "node versions.js"
  },
  "keywords": [],
  "author": "",
  "license": "ISC",
  "type": "module",
  "dependencies": {
    "dayjs": "^1.11.23"
  },
  "devDependencies": {
    "semver": "^7.8.6"
  }
}$ npm start
> my-first-npm-app@1.0.0 start
> node app.js
Launch date: 25 Dec 2026
Days to go: 49
One week later: Friday, 13 NovemberClick ▶ Run to run npm start (real output).
npm startandnpm testare special: they work without the wordrun.- Every other script needs
npm run:npm run dev,npm run versions. node --watch app.jsrestarts your app every time you save a file. It is built into Node.js, so you no longer need nodemon for simple projects.- Run
npm runwith no name to list every script in the project.
You can also set scripts from the terminal with npm pkg set:
$ npm pkg set scripts.dev="node --watch app.js"
$ npm run
Lifecycle scripts included in my-first-npm-app@1.0.0:
  test
    node --test
  start
    node app.js
available via `npm run-script`:
  dev
    node --watch app.js
  versions
    node versions.js
Running tools with npx
npx also comes with npm. It runs a command from a package without installing it globally. If the package is already in your project, npx uses that copy; otherwise it downloads it to a cache and runs it. Here we use the semver command-line tool from our dev dependency:
# which of these versions match ^1.11.0?
$ npx semver -r "^1.11.0" 1.10.7 1.11.5 1.12.0 2.0.0
1.11.5
1.12.0
# create projects without global installs (asks before downloading)
$ npx create-vite@latest my-react-appnpx and project dev dependencies over npm install -g. Global packages are shared by all projects on your computer, so two projects that need different versions will fight.Update, remove and audit packages
Packages get new versions all the time. These commands keep your project healthy. Here an older project has dayjs pinned to 1.11.10:
# what is out of date?
$ npm outdated
Package  Current   Wanted   Latest  Location            Depended by
dayjs    1.11.10  1.11.10  1.11.23  node_modules/dayjs  old
# update within your ranges (the "Wanted" column)
$ npm update
# jump to the newest version, even a new major
$ npm install dayjs@latest
# remove a package from node_modules and package.json
$ npm uninstall semver
# check for known security problems
$ npm audit
$ npm audit fix
# see what is installed
$ npm ls
Current is what you have, Wanted is the newest version allowed by your range, and Latest is the newest version on the registry. When Latest is a new major version, read the package changelog before upgrading.
Common errors and fixes
| Error | Why it happens | Fix |
|---|---|---|
npm error code ENOENT … Could not read package.json | You ran npm outside your project folder, or the project has no package.json yet. | cd into the project folder, or run npm init -y. |
ERR_MODULE_NOT_FOUND: Cannot find package ‘dayjs’ | The package is not installed in this project (or node_modules was deleted). | Run npm install (or npm install dayjs) in the project folder. |
npm error code E404 … is not in this registry | Typo in the package name, or the package does not exist. | Check the exact name on npmjs.com and install again. |
npm error Missing script: "dev" | There is no dev entry in "scripts". | Run npm run to list scripts, then add the missing one. |
npm ci fails: package.json and package-lock.json are not in sync | Someone changed package.json without updating the lock file. | Run npm install locally and commit the updated lock file. |
npm error code ERESOLVE unable to resolve dependency tree | Two packages want different versions of the same peer dependency. | Update the older package first; use --legacy-peer-deps only as a last resort. |
EACCES: permission denied on global install | npm is trying to write to a system folder. | Use npx, or install Node.js with a version manager (nvm, fnm). Do not use sudo. |
npm and package.json best practices
- Commit
package.jsonandpackage-lock.json; ignorenode_modules. Anyone can rebuildnode_moduleswith one command. - Use
npm ciin CI and on servers. It is faster and gives exactly the versions you tested. - Put tools in devDependencies. Production stays smaller, faster to install and safer.
- Check a package before installing it: weekly downloads, last publish date, open issues and licence on npmjs.com. Fewer, well-maintained packages mean fewer security problems.
- Watch for typos. Attackers publish look-alike names (for example
expresss). Copy names from the official docs. - Run
npm auditandnpm outdatedregularly, and update in small steps with your tests running. - Add
"private": trueandenginesto app projects so nobody publishes them by mistake and everyone knows the Node.js version.
Practice task
Build a tiny “festival countdown” app using npm:
- Create a folder
countdown, runnpm init -yandnpm pkg set type=module. - Install
dayjsas a dependency. - Create
app.jsthat prints how many days are left until Diwali, New Year and your birthday. - Add scripts:
start(node app.js) anddev(node --watch app.js). - Delete
node_modules, runnpm ci, thennpm start. It should still work, because the lock file remembers everything. - Bonus: install
semveras a dev dependency and usenpx semverto test which versions~1.11.0accepts.
FAQ
What is the difference between npm and Node.js?
Node.js runs JavaScript on your computer or server. npm is a separate tool that ships with Node.js and manages the packages your code uses. You run code with node and manage packages with npm.
Should I commit package-lock.json to Git?
Yes, for apps always. It makes every install on every machine use exactly the same versions, so bugs cannot appear just because someone installed a day later.
What does the ^ symbol mean in package.json?
The caret allows updates that do not change the first non-zero number. ^1.11.0 allows any 1.x version from 1.11.0 up, but never 2.0.0.
What is the difference between npm install and npm ci?
npm install installs packages and may update the lock file. npm ci deletes node_modules and installs exactly what package-lock.json says, failing if it does not match package.json. Use install while developing and ci in pipelines and on servers.
Should I use npm, pnpm, Yarn or Bun?
Start with npm: it is built in and every tutorial supports it. pnpm, Yarn and Bun use the same package.json and are good choices later for faster installs or monorepos. Pick one per project and do not mix lock files.
Can I delete the node_modules folder?
Yes. It is safe to delete at any time. Run npm install or npm ci to get it back.
fs/promises, build safe paths with path, list folders and handle file errors the right way.Conclusion
You now know how npm and package.json work together. npm downloads packages from the registry into node_modules; package.json lists what your project needs and the scripts it runs; package-lock.json remembers the exact versions. You can tell dependencies from devDependencies, read version ranges like ^ and ~, use npm ci for reliable installs, run tools with npx and keep packages updated and safe. These skills are used in every Node.js project you will build in the rest of this series.
New posts every day on DevDojo
Follow the full Node.js series, from your first script to a production-ready API. Bookmark devdojo.co.in and come back for the next lesson.