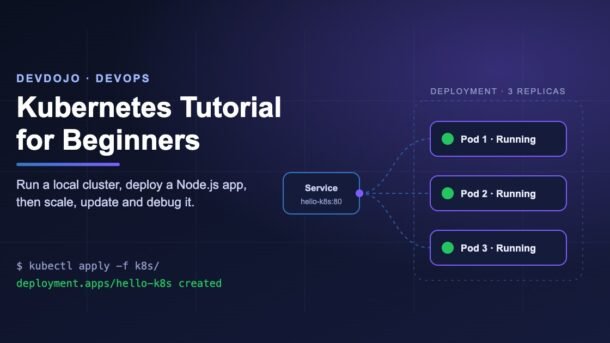
If you have built a Docker image and wondered “how do big companies run hundreds of these without breaking things?”, the answer is usually Kubernetes. This Kubernetes tutorial for beginners takes you from zero to a working app: you will create a free local cluster on your laptop, deploy a small Node.js API, open it in your browser, scale it to more copies, ship a new version with zero downtime, and fix the most common errors along the way.
No cloud account, no credit card, and no prior Kubernetes knowledge needed. If you know basic Docker, you are ready.
Quick Summary
- Kubernetes runs your containers for you: it starts them, restarts them when they crash and spreads traffic between copies.
- You describe what you want in YAML files (a Deployment and a Service), and Kubernetes keeps reality matching that description.
- We use kind (Kubernetes in Docker) to get a real cluster on your laptop in about a minute.
- Key commands:
kubectl apply,kubectl get pods,kubectl logs,kubectl describe,kubectl rollout. - Most beginner errors (
ImagePullBackOff,CrashLoopBackOff,Pending) are solved by readingkubectl describe pod.
What Is Kubernetes? (Explained Simply)
Kubernetes (often written K8s — “K”, then 8 letters, then “s”) is an open-source system that runs and manages containers across one or many machines. It was created at Google and is now maintained by the Cloud Native Computing Foundation. The current release at the time of writing is Kubernetes v1.37, but everything in this guide uses stable features that work the same on recent versions.
Think of Kubernetes like the manager of a busy restaurant kitchen. You do not tell each cook what to do every minute. You say “I always want 3 cooks making pizza”. If one cook goes home sick, the manager calls a replacement. If it gets busy, you change the number to 5. Kubernetes does exactly this for containers.
If you already use Docker Compose (see our Docker Compose tutorial), here is the simple difference: Compose runs containers on one machine and is great for local development. Kubernetes runs containers on many machines and keeps them healthy in production.
Key Words You Need to Know
Kubernetes has a lot of vocabulary. For this tutorial you only need six words:
| Word | What it means in plain English |
|---|---|
| Cluster | A group of machines (nodes) managed together by Kubernetes. |
| Node | One machine in the cluster (a real server, a cloud VM, or a Docker container with kind). |
| Pod | The smallest unit Kubernetes runs. Usually one container plus its network address. |
| Deployment | A rule like “keep 3 Pods of this image running”. It handles restarts and updates. |
| Service | A stable name and address that sends traffic to the right Pods, even as Pods come and go. |
| kubectl | The command-line tool you use to talk to the cluster (say “cube-control” or “cube-C-T-L”). |
Step 1: Install Tools and Create a Local Cluster
You need three tools: Docker (Docker Desktop on Windows/macOS, or Docker Engine on Linux), kubectl and kind. kind runs each Kubernetes node as a Docker container, so it is light and quick to delete.
# macOS (Homebrew)
brew install kubectl kind

# Windows (winget) — run in PowerShell
winget install Kubernetes.kubectl
winget install Kubernetes.kind

# Linux: follow the "Installing From Release Binaries" steps at
# https://kind.sigs.k8s.io/docs/user/quick-start/

# Check that everything works
docker version
kubectl version --client
kind version
Now create a cluster named devdojo:
kind create cluster --name devdojo

# kind sets your kubectl "context" automatically. Confirm it:
kubectl cluster-info --context kind-devdojo
kubectl get nodes
You should see something like this:
NAME                    STATUS   ROLES           AGE   VERSION
devdojo-control-plane Ready control-plane 45s v1.3x.xStep 2: Build the Node.js App Image
Create a folder called hello-k8s with a tiny API. It uses only Node’s built-in modules, so there is nothing to npm install. It returns the Pod’s name, which lets you see load balancing later.
// server.js
const http = require('node:http');
const os = require('node:os');

const PORT = process.env.PORT || 3000;
const GREETING = process.env.GREETING || 'Hello from Kubernetes';
const VERSION = '1.0';

const server = http.createServer((req, res) => {
  // Health check endpoint used by Kubernetes probes
  if (req.url === '/healthz') {
    res.writeHead(200, { 'Content-Type': 'text/plain' });
    return res.end('ok');
  }

  res.writeHead(200, { 'Content-Type': 'application/json' });
  res.end(JSON.stringify({
    message: GREETING,
    version: VERSION,
    pod: os.hostname() // each Pod has its own hostname
  }));
});

server.listen(PORT, () => console.log(`Listening on port ${PORT}`));

// Kubernetes sends SIGTERM before stopping a Pod: finish requests, then exit
process.on('SIGTERM', () => {
  console.log('SIGTERM received, shutting down');
  server.close(() => process.exit(0));
});
# Dockerfile
FROM node:24-alpine
WORKDIR /app
COPY server.js .
ENV NODE_ENV=production
EXPOSE 3000
USER node
CMD ["node", "server.js"]Build the image and load it into the kind cluster. This “load” step is important: kind nodes cannot see images on your laptop until you copy them in.
docker build -t hello-k8s:1.0 .
kind load docker-image hello-k8s:1.0 --name devdojo1.0, not latest. With the latest tag, Kubernetes tries to pull the image from Docker Hub every time, which fails for a local-only image and gives you ImagePullBackOff.Step 3: Write Your First Deployment
Kubernetes is declarative: you write down the result you want, not the steps. Create a folder k8s/ and add this file:
# k8s/deployment.yaml
apiVersion: apps/v1
kind: Deployment
metadata:
  name: hello-k8s
  labels:
    app: hello-k8s
spec:
  replicas: 3                  # keep 3 Pods running at all times
  selector:
    matchLabels:
      app: hello-k8s           # manage Pods that have this label
  template:                    # the blueprint for each Pod
    metadata:
      labels:
        app: hello-k8s         # must match the selector above
    spec:
      containers:
        - name: web
          image: hello-k8s:1.0
          imagePullPolicy: IfNotPresent
          ports:
            - containerPort: 3000
          resources:
            requests:          # what the Pod needs to be scheduled
              cpu: "100m"      # 0.1 of a CPU core
              memory: "64Mi"
            limits:
              memory: "128Mi"  # killed if it uses more than this
          readinessProbe:      # "ready to receive traffic?"
            httpGet:
              path: /healthz
              port: 3000
            initialDelaySeconds: 2
            periodSeconds: 5
          livenessProbe:       # "still alive, or should I restart it?"
            httpGet:
              path: /healthz
              port: 3000
            initialDelaySeconds: 5
            periodSeconds: 10
Apply it and watch the Pods start:
kubectl apply -f k8s/deployment.yaml
kubectl get pods -w        # -w = watch; press Ctrl+C to stop
NAME READY STATUS RESTARTS AGE
hello-k8s-6d9f7c8b5d-4xk2p 1/1 Running 0 12s
hello-k8s-6d9f7c8b5d-9mzqt 1/1 Running 0 12s
hello-k8s-6d9f7c8b5d-tr7wl 1/1 Running 0 12sNow try the self-healing magic. Delete one Pod and immediately list them again:
kubectl delete pod hello-k8s-6d9f7c8b5d-4xk2p   # use one of YOUR pod names
kubectl get pods
A brand-new Pod appears within seconds, because the Deployment says “3”, and Kubernetes sees only 2. This loop — compare desired state to real state, then fix the difference — is the heart of Kubernetes.
Step 4: Expose the App with a Service
Pods get new IP addresses every time they are replaced, so you should never call a Pod directly. A Service gives your app one stable name and spreads requests over all ready Pods that match its label selector.
# k8s/service.yaml
apiVersion: v1
kind: Service
metadata:
  name: hello-k8s
spec:
  type: ClusterIP          # reachable inside the cluster
  selector:
    app: hello-k8s         # send traffic to Pods with this label
  ports:
    - port: 80             # port of the Service
      targetPort: 3000     # port the container listens on
kubectl apply -f k8s/service.yaml
kubectl get service hello-k8s
# Forward a port from your laptop to the Service
kubectl port-forward service/hello-k8s 8080:80Open http://localhost:8080 or, in a second terminal, run curl http://localhost:8080:
{"message":"Hello from Kubernetes","version":"1.0","pod":"hello-k8s-6d9f7c8b5d-9mzqt"}kubectl port-forward picks one Pod behind the Service and sticks to it. Real traffic inside the cluster is spread across all Pods. To see that, run a temporary Pod and call the Service by name:
kubectl run curl --rm -it --image=curlimages/curl --restart=Never -- \
sh -c 'for i in 1 2 3 4 5 6; do curl -s http://hello-k8s; echo; done'http://hello-k8s — Kubernetes has built-in DNS for Service names.Step 5: Move Settings into a ConfigMap
Hard-coding settings inside the image means rebuilding for every change. A ConfigMap stores plain settings (non-secret values) that are passed into the container as environment variables.
# k8s/configmap.yaml
apiVersion: v1
kind: ConfigMap
metadata:
  name: hello-config
data:
  GREETING: "Namaste from DevDojo on Kubernetes"
Then tell the container to read it. Add envFrom under the container in deployment.yaml (same indent level as ports):
          envFrom:
            - configMapRef:
                name: hello-config
kubectl apply -f k8s/ # applies every file in the folder
kubectl rollout restart deployment/hello-k8s # env vars are read at start-upRefresh localhost:8080 (restart the port-forward if it stopped) and you will see the new greeting.
kubectl create secret generic db-pass --from-literal=PASSWORD=...) and keep the real values out of Git. Note that Secrets are only base64-encoded by default, so production clusters should also enable encryption at rest or use an external secret manager.Step 6: Scale, Update and Roll Back
Scale up and down
kubectl scale deployment/hello-k8s --replicas=5
kubectl get pods

# Better long-term: change "replicas: 5" in deployment.yaml and run
kubectl apply -f k8s/deployment.yamlShip version 2.0 with zero downtime
Change const VERSION = '1.0'; to '2.0' in server.js, then:
docker build -t hello-k8s:2.0 .
kind load docker-image hello-k8s:2.0 --name devdojo

# Update the image of the "web" container
kubectl set image deployment/hello-k8s web=hello-k8s:2.0
kubectl rollout status deployment/hello-k8s
Kubernetes performs a rolling update: it starts new Pods, waits until their readiness probe passes, and only then removes old Pods. Users never see the app go down. This is why the readiness probe from Step 3 matters so much.
Something broke? Roll back
kubectl rollout history deployment/hello-k8s
kubectl rollout undo deployment/hello-k8s          # back to the previous version
kubectl rollout undo deployment/hello-k8s --to-revision=1
kubectl Cheat Sheet (Interactive)
Click a tab to see the commands you will use most for each job.
kubectl get pods                 # list Pods
kubectl get pods -o wide         # + node and IP
kubectl get deploy,svc,cm        # several kinds at once
kubectl get all                  # common objects in the namespace
kubectl get events --sort-by=.lastTimestamp
kubectl describe pod <pod-name> # events = the reason it fails
kubectl logs <pod-name> # app output
kubectl logs <pod-name> --previous # logs from the crashed run
kubectl logs -f deploy/hello-k8s # follow logs of one Pod in it
kubectl exec -it <pod-name> -- sh # open a shell insidekubectl apply -f k8s/ # create or update
kubectl diff -f k8s/ # preview a change
kubectl scale deploy/hello-k8s --replicas=4
kubectl set image deploy/hello-k8s web=hello-k8s:2.0
kubectl rollout undo deploy/hello-k8skubectl delete -f k8s/ # remove what you applied
kind delete cluster --name devdojo # delete the whole cluster
kind get clusters # check what is leftCommon Errors and Fixes
When something goes wrong, your first command is almost always kubectl describe pod <name>. Scroll to the Events section at the bottom — the reason is usually written there in plain words.
| Error / Status | What it usually means | How to fix it |
|---|---|---|
ImagePullBackOff / ErrImagePull | The node cannot get the image. | With kind, run kind load docker-image name:tag --name devdojo. Check the image name and tag spelling. Avoid the latest tag for local images. |
CrashLoopBackOff | The container starts and then exits again and again. | Run kubectl logs <pod> --previous to see the crash. Common causes: missing env var, wrong start command, app listening on a different port than the probe checks. |
Pending (forever) | No node has enough free CPU/memory for the requests. | Lower resources.requests, reduce replicas, or give Docker Desktop more memory. |
0/1 READY but Running | The readiness probe is failing, so the Service sends no traffic. | Check that the probe path and port match the app (/healthz on 3000). |
OOMKilled | The container used more memory than its limit. | Raise limits.memory or fix the memory leak. |
connection to the server localhost:8080 was refused | kubectl has no cluster configured, or the wrong context. | Run kubectl config get-contexts and kubectl config use-context kind-devdojo. Is Docker running? |
selector does not match template labels | The Deployment’s selector.matchLabels and Pod labels differ. | Make both exactly app: hello-k8s. Note that a Deployment’s selector cannot be changed later; delete and recreate it. |
| Service returns nothing / times out | The Service selector matches no Pods. | Run kubectl get endpointslices -l kubernetes.io/service-name=hello-k8s. If empty, fix the labels. |
Kubernetes Best Practices for Beginners
- Keep all YAML in Git. Treat the
k8s/folder like code: review it, version it, and apply it from CI. Our GitHub Actions CI/CD guide is a good next step for automating builds. - Always use specific image tags (
1.4.2or a Git commit SHA), neverlatest, so you know exactly what runs and can roll back. - Add readiness and liveness probes to every web container. Without readiness, rolling updates can send users to Pods that are not ready yet.
- Set resource requests so the scheduler can place Pods sensibly, and a memory limit to stop one app from starving the node.
- Handle
SIGTERMin your app (like ourserver.js) so in-flight requests finish before a Pod stops. - Run at least 2 replicas of anything users depend on, so one Pod restarting never causes an outage.
- Use namespaces (
kubectl create namespace staging) to separate environments or teams in one cluster. - Keep secrets out of images and ConfigMaps. Use Secrets plus a proper secret manager in production.
- Run containers as a non-root user (we used
USER nodein the Dockerfile). - Start managed in production. Services like Amazon EKS, Google GKE and Azure AKS run the control plane for you, so you can focus on your apps.
Where to go after this tutorial
The official Kubernetes Basics tutorial is an excellent free resource for each of these topics.
Frequently Asked Questions
Is Kubernetes hard to learn for beginners?
The basics are not hard. If you understand Docker, you can learn Pods, Deployments and Services in a weekend by following this Kubernetes tutorial for beginners. The difficult parts (networking, security, storage) can be learned slowly, when you need them.
Do I need to learn Docker before Kubernetes?
Yes, at least the basics: what an image is, how to write a Dockerfile, and how to run a container. Kubernetes runs container images, so Docker knowledge makes everything easier.
What is the difference between kind, minikube and k3s?
All three run Kubernetes locally. kind runs nodes as Docker containers and is fast to create and delete (great for learning and CI). minikube has many add-ons and a dashboard. k3s is a lightweight Kubernetes distribution that is also used on small servers and edge devices.
Should I use Kubernetes for a small project?
Often no. For a simple app with low traffic, a single server with Docker Compose, or a platform like Render, Railway or Vercel, is cheaper and simpler. Kubernetes shines when you have many services, need high availability, or your company already uses it. Learning it is still a strong career skill.
What is the difference between a Pod and a container?
A container is one running image. A Pod is a wrapper around one or more containers that share the same network address and storage. Most Pods hold exactly one container.
Is Kubernetes knowledge useful for jobs in India and abroad?
Yes. DevOps, SRE, cloud and backend roles at Indian product companies, IT service firms and global startups commonly list Kubernetes. Being able to deploy, scale and debug an app like you did here is a practical skill you can show in interviews.
Wrapping Up This Kubernetes Tutorial for Beginners
You just did what many developers find scary: you created a Kubernetes cluster, deployed a Node.js app with three replicas, exposed it with a Service, moved settings into a ConfigMap, scaled it, shipped a new version with zero downtime, and rolled it back. The key idea to remember is simple — you describe the desired state in YAML, and Kubernetes keeps working to make it true.
Next, try adding a second service (for example a Redis Pod), put your YAML into a Git repo, and deploy it from a CI pipeline. When you are done experimenting, clean up with kind delete cluster --name devdojo.
New posts every day on DevDojo
Practical tutorials on AI, Frontend, Backend and DevOps — written in simple English for developers in India and around the world.
Read more DevDojo tutorials → · Found this useful? Leave a comment with your questions below.