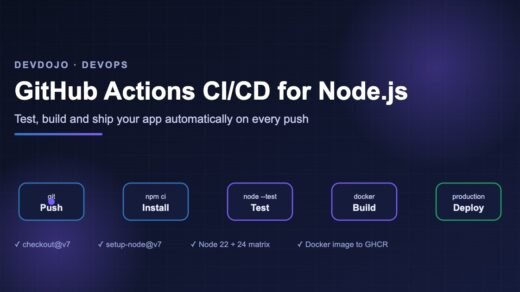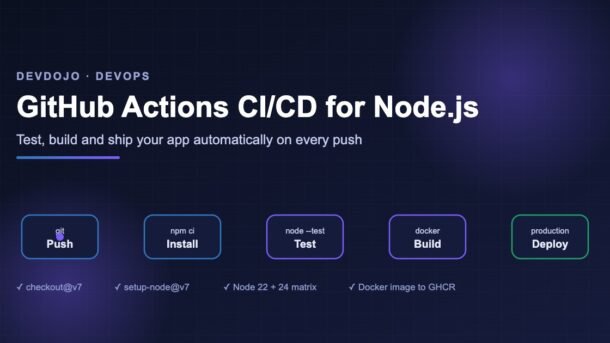
- GitHub Actions CI/CD lets GitHub run your tests, build your app and deploy it automatically every time you push code — for free on public repos.
- A workflow is a YAML file in
.github/workflows/. It has triggers (when to run), jobs (groups of work) and steps (single commands). - For Node.js, the core recipe is:
actions/checkout@v7→actions/setup-node@v7→npm ci→npm test. - Add a version matrix (Node 22 and 24), caching, safe permissions, a Docker image push to GitHub Container Registry and a protected production deploy.
You fix a bug, push it, and an hour later a teammate tells you the build is broken. Sounds familiar? GitHub Actions CI/CD solves this by running your tests and deployment steps automatically on GitHub’s servers every time code changes. In this beginner-friendly guide, you will build a complete pipeline for a Node.js app — from a 10-line “hello CI” workflow to a production setup with a version matrix, test reports, a Docker image and a protected deploy. Every example uses the current major versions of the official actions, so you can copy them straight into your project.
What is CI/CD? (in plain words)
CI stands for Continuous Integration. Every time someone pushes code or opens a pull request, a robot installs the project and runs the tests. If something breaks, you know within minutes — not after the code reaches users.
CD stands for Continuous Delivery (or Continuous Deployment). Once the tests pass, the same robot builds your app and ships it — to a server, a container registry or a hosting platform.
How GitHub Actions works
GitHub Actions has only a few building blocks. Once you understand them, every workflow file becomes easy to read.
| Building block | What it means | Example |
|---|---|---|
| Workflow | One YAML file in .github/workflows/. A repo can have many. | ci.yml, release.yml |
| Event (trigger) | What starts the workflow. | push, pull_request, schedule |
| Job | A group of steps that runs on one fresh virtual machine. Jobs run in parallel unless you link them with needs. | test, deploy |
| Runner | The machine that runs a job. GitHub provides Linux, Windows and macOS runners. | ubuntu-latest |
| Step | A single shell command (run) or a reusable action (uses). | npm test |
| Action | A ready-made, shareable step published by GitHub or the community. | actions/checkout@v7 |
needs makes one job wait for another.The sample Node.js app
To keep the focus on the pipeline, we will use a tiny Node.js app with zero dependencies and the built-in test runner (node --test). Create this structure:
my-api/
├── .github/
│   └── workflows/
│       └── ci.yml
├── src/
│   ├── math.js
│   ├── math.test.js
│   └── server.js
├── Dockerfile
├── package.json
└── package-lock.jsonexport function add(a, b) {
if (typeof a !== 'number' || typeof b !== 'number') {
throw new TypeError('add() expects two numbers');
}
return a + b;
}import { test } from 'node:test';
import assert from 'node:assert/strict';
import { add } from './math.js';
test('adds two numbers', () => {
assert.equal(add(2, 3), 5);
});
test('throws on bad input', () => {
assert.throws(() => add('2', 3), TypeError);
});import { createServer } from 'node:http';
import { add } from './math.js';
const port = process.env.PORT || 3000;
createServer((req, res) => {
res.setHeader('Content-Type', 'application/json');
res.end(JSON.stringify({ ok: true, sum: add(2, 3) }));
}).listen(port, () => console.log(`API running on port ${port}`));{
"name": "my-api",
"version": "1.0.0",
"type": "module",
"engines": { "node": ">=22" },
"scripts": {
"start": "node src/server.js",
"test": "node --test"
}
}Run npm install once so that package-lock.json is created, then npm test locally. You should see two passing tests. Commit everything, including the lock file — CI needs it.
node --test automatically finds files named like *.test.js. No Jest or Mocha needed. If you are new to async code in tests, our guide on JavaScript Promises is a good refresher.Your first GitHub Actions CI/CD workflow
Create the file .github/workflows/ci.yml. The folder name must be exactly .github/workflows — otherwise GitHub ignores the file.
name: CI

on:
  push:
    branches: [main]
  pull_request:
    branches: [main]

jobs:
  test:
    runs-on: ubuntu-latest
    steps:
      - name: Check out the code
        uses: actions/checkout@v7

      - name: Set up Node.js
        uses: actions/setup-node@v7
        with:
          node-version: 24
          cache: npm

      - name: Install dependencies
        run: npm ci

      - name: Run tests
        run: npm test
Push this file and open the Actions tab of your repository. You will see the workflow run live, step by step. A green tick means every step exited with code 0; a red cross means some step failed, and you can click it to read the logs.
Line by line:
on— run on pushes tomainand on pull requests that targetmain.runs-on: ubuntu-latest— use a fresh Linux virtual machine hosted by GitHub.actions/checkout@v7— download your repository code onto the runner. (Version 7 also refuses, by default, to check out code from forked pull requests in risky triggers likepull_request_target— a nice security upgrade.)actions/setup-node@v7— install Node.js 24 and cache npm’s download folder so later runs are faster.npm ci— a clean, exact install frompackage-lock.json. It is faster and more predictable thannpm installin CI.
main is healthy: Choosing triggers: when should your workflow run?
The on: section decides when GitHub starts your workflow. Click each tab below to see the four triggers beginners use most.
Runs when commits land on a branch. Perfect for testing main and for deploying after a merge. You can also limit it to certain files with paths.
on:
  push:
    branches: [main]
    paths: ['src/**', 'package*.json']
Runs when a pull request is opened or updated. This is the heart of CI: you see test results right on the PR before merging. Secrets are not shared with PRs from forks, which keeps your keys safe.
on:
  pull_request:
    branches: [main]
    types: [opened, synchronize, reopened]
Adds a “Run workflow” button in the Actions tab, so you can start it by hand — great for deployments or one-off jobs. You can even ask for inputs.
on:
  workflow_dispatch:
    inputs:
      environment:
        description: 'Where to deploy'
        type: choice
        options: [staging, production]
        default: staging
Runs on a timer using cron syntax (always in UTC). Useful for nightly tests or dependency checks. 30 3 * * * means 03:30 UTC, which is 09:00 IST.
on:
  schedule:
    - cron: '30 3 * * *'
Matrix, caching and speed
Real projects need a little more than the first workflow. Here is an improved ci.yml that tests on two Node.js LTS versions (22 and 24) in parallel, cancels outdated runs, limits permissions and adds a timeout.
name: CI

on:
  push:
    branches: [main]
  pull_request:

# Only read access to the repo by default (safer)
permissions:
  contents: read

# If you push again quickly, cancel the older run on the same branch
concurrency:
  group: ci-${{ github.workflow }}-${{ github.ref }}
  cancel-in-progress: true

jobs:
  test:
    name: Test on Node ${{ matrix.node-version }}
    runs-on: ubuntu-latest
    timeout-minutes: 10
    strategy:
      fail-fast: false
      matrix:
        node-version: [22, 24]
    steps:
      - uses: actions/checkout@v7

      - uses: actions/setup-node@v7
        with:
          node-version: ${{ matrix.node-version }}
          cache: npm

      - run: npm ci
      - run: npm test
What each new part does:
strategy.matrixcreates one job per value — here two jobs run side by side.fail-fast: falselets both finish even if one fails, so you see the full picture.cache: npmstores npm’s download cache between runs, keyed onpackage-lock.json. When the lock file changes, the cache refreshes automatically.permissions: contents: readlimits what the automaticGITHUB_TOKENcan do. Give more only to the jobs that need it.concurrencysaves minutes: pushing three commits in a row will not run three full pipelines.timeout-minutesstops a stuck job early (the default limit is 6 hours!).
Saving test reports as artifacts
When a test fails, it helps to download a proper report. The Node.js test runner can print readable output to the log and write a JUnit XML file at the same time. Then actions/upload-artifact@v7 saves it on the run page.
      - name: Run tests with reports
        run: >
          node --test
          --test-reporter=spec --test-reporter-destination=stdout
          --test-reporter=junit --test-reporter-destination=test-results.xml

      - name: Upload test report
        if: always()
        uses: actions/upload-artifact@v7
        with:
          name: test-results-node-${{ matrix.node-version }}
          path: test-results.xml
          retention-days: 7
if: always() is important: without it, the upload step is skipped when tests fail — exactly when you need the report most. Each matrix job uses a different artifact name, because two artifacts in the same run cannot share a name.
Build and push a Docker image to GHCR
Now the “CD” part. A very common pattern is to package the app as a Docker image and publish it to GitHub Container Registry (GHCR) whenever you create a version tag like v1.2.0. First, a small Dockerfile:
FROM node:24-alpine
WORKDIR /app
COPY package*.json ./
RUN npm ci --omit=dev
COPY src ./src
ENV NODE_ENV=production
EXPOSE 3000
USER node
CMD ["node", "src/server.js"]
Then a separate release workflow using Docker’s official actions:
.github/workflows/release.ymlname: Release image
on:
push:
tags: ['v*']
permissions:
contents: read
packages: write # needed to push to ghcr.io
jobs:
docker:
runs-on: ubuntu-latest
steps:
- uses: actions/checkout@v7
- uses: docker/setup-buildx-action@v4
- name: Log in to GHCR
uses: docker/login-action@v4
with:
registry: ghcr.io
username: ${{ github.actor }}
password: ${{ secrets.GITHUB_TOKEN }}
- name: Create tags and labels
id: meta
uses: docker/metadata-action@v6
with:
images: ghcr.io/${{ github.repository }}
tags: |
type=semver,pattern={{version}}
type=semver,pattern={{major}}.{{minor}}
type=sha
- name: Build and push
uses: docker/build-push-action@v7
with:
context: .
push: true
tags: ${{ steps.meta.outputs.tags }}
labels: ${{ steps.meta.outputs.labels }}
cache-from: type=gha
cache-to: type=gha,mode=maxTo release, run git tag v1.0.0 && git push origin v1.0.0. The metadata action turns that tag into image tags like 1.0.0, 1.0 and sha-abc1234, and it also makes the image name lowercase (registries reject capital letters). cache-from/cache-to: type=gha reuses Docker layers between runs, so rebuilds take seconds when only your code changed.
secrets.GITHUB_TOKEN is created automatically for every run — you only have to allow packages: write.Deploy with secrets and environments
Most hosting platforms (Render, Railway, Coolify, your own VPS script and many more) give you a deploy hook: a secret URL that starts a new deployment when you call it. Let’s add a deploy job to ci.yml that runs only after tests pass on main.
Step 1 — store the secret. In your repo go to Settings → Environments → New environment, name it production, and add a secret called DEPLOY_HOOK_URL. In the same screen you can turn on Required reviewers, so a human must approve every production deploy.
Step 2 — add the job:
.github/workflows/ci.yml (add below the test job) deploy:
needs: test
if: github.event_name == 'push' && github.ref == 'refs/heads/main'
runs-on: ubuntu-latest
environment:
name: production
url: https://my-api.example.com
steps:
- name: Trigger deployment
env:
DEPLOY_HOOK_URL: ${{ secrets.DEPLOY_HOOK_URL }}
run: curl --fail --silent --show-error -X POST "$DEPLOY_HOOK_URL"
- name: Smoke test
run: |
sleep 30
curl --fail --retry 5 --retry-delay 10 https://my-api.example.com/needs: test— waits for all matrix test jobs to succeed.if:— skips deploys for pull requests and other branches.environment: production— unlocks that environment’s secrets and applies its protection rules.- Passing the secret through
env(not pasting${{ }}directly inside the command) is a safer habit, and GitHub hides secret values in logs automatically. curl --failmakes the step fail on HTTP errors instead of silently “passing”.
echo them for debugging. Anyone who can read the repo — or the logs — could steal them. For cloud providers like AWS, Azure or Google Cloud, prefer OpenID Connect (OIDC) with permissions: id-token: write, which gives short-lived credentials instead of long-lived keys. See GitHub’s official secure use guide.Bonus: reuse the setup with a composite action
If several workflows repeat “checkout + setup Node + npm ci”, move those steps into a small local action:
.github/actions/setup-project/action.ymlname: Setup project
description: Install Node.js and dependencies
inputs:
node-version:
description: Node.js version
default: '24'
runs:
using: composite
steps:
- uses: actions/setup-node@v7
with:
node-version: ${{ inputs.node-version }}
cache: npm
- run: npm ci
shell: bashUse it in any job after checkout with - uses: ./.github/actions/setup-project. Note that run steps inside a composite action must declare shell.
Common errors and fixes
| Error message (or symptom) | Why it happens | How to fix it |
|---|---|---|
| Workflow never starts | File is not in .github/workflows/, or the branch name in on: doesn’t match (e.g. master vs main). | Check the folder path and branch filters. YAML files must end in .yml or .yaml. |
Invalid workflow file | Wrong indentation or tabs in YAML. | Use 2 spaces, never tabs. The Actions tab shows the exact line number. |
npm ci fails: “can only install with an existing package-lock.json” | The lock file was not committed (or is in .gitignore). | Run npm install locally and commit package-lock.json. |
Dependencies lock file is not found | cache: npm could not find a lock file in the repo root. | Commit the lock file, or set cache-dependency-path: app/package-lock.json for subfolders. |
Resource not accessible by integration | GITHUB_TOKEN lacks a permission (e.g. writing PR comments or packages). | Add only the needed scope, such as pull-requests: write or packages: write. |
denied: permission_denied when pushing to ghcr.io | Missing packages: write, or the package belongs to another repo. | Add the permission; in the package settings give this repo “Write” access. |
repository name must be lowercase | Your GitHub username or repo has capital letters. | Use docker/metadata-action (it lowercases names) as shown above. |
| Secret is empty in a PR | Secrets are not passed to workflows triggered by pull requests from forks. | Expected and safe. Run secret-needing steps only on push to main. |
| Tests pass locally, fail in CI | Different Node version, timezone, or a missing environment variable. | Match versions with a matrix or node-version-file: .nvmrc; set needed env values in the job. |
Best practices for GitHub Actions CI/CD
- Keep CI fast. Aim for under 5 minutes. Use caching, a matrix, and
concurrencyto cancel stale runs. - Use least privilege. Set
permissions: contents: readat the top and raise it per job only where needed. - Pin action versions. Use at least a major tag (
@v7). For high-security repos, pin to a full commit SHA and let Dependabot update it. - Let Dependabot update actions. Add a
.github/dependabot.ymlentry withpackage-ecosystem: github-actionsso you hear about new major versions. - Protect your main branch. In branch rules, require the CI checks to pass before a PR can be merged.
- Separate CI from CD. Tests run on every PR; deploys run only from
mainor tags, through a protected environment. - Add timeouts.
timeout-minuteson every job avoids burning hours of minutes on a hung process. - Make failures readable. Name your steps clearly and upload reports as artifacts.
version: 2
updates:
  - package-ecosystem: github-actions
    directory: /
    schedule:
      interval: weekly
  - package-ecosystem: npm
    directory: /
    schedule:
      interval: weekly
Building AI tools in Node.js? The same pipeline works great for the server we built in How to Build an MCP Server in TypeScript — just add a npm run build step before the tests.
FAQ
Is GitHub Actions free?
Yes for public repositories using standard GitHub-hosted runners. Private repositories get a monthly allowance of free minutes and storage depending on your plan; after that, usage is billed. Linux runners use the fewest minutes, so prefer ubuntu-latest unless you need Windows or macOS.
What is the difference between npm ci and npm install?
npm ci installs exactly what is in package-lock.json, deletes any existing node_modules first and fails if the lock file and package.json disagree. That makes builds repeatable, which is what you want in CI.
Can I run GitHub Actions on my own server?
Yes. You can register a self-hosted runner (a small agent program) on your own machine and use runs-on: self-hosted. Be careful with public repos: anyone opening a PR could run code on your machine.
How do I test a workflow without pushing many commits?
Add workflow_dispatch so you can run it from the Actions tab, work on a separate branch, or use the open-source tool act to run workflows locally in Docker.
Should I use ubuntu-latest or a fixed version?
ubuntu-latest is fine for most projects. If you need total stability, pin a version like ubuntu-24.04 and upgrade on your own schedule.
Is GitHub Actions good for Indian startups and freelancers?
Very much so. It needs no extra server or paid CI tool, the free tier covers most small projects, and the same skills are listed in many DevOps and full-stack job descriptions.
Conclusion
You now have a complete GitHub Actions CI/CD pipeline for Node.js: tests on every pull request across two LTS versions, cached installs, downloadable test reports, a Docker image published to GHCR on every version tag, and a protected production deploy. Start with the 10-line workflow, get it green, then add one improvement at a time. Small, steady upgrades beat a giant YAML file you don’t understand.
Your next step: open your favourite side project, add .github/workflows/ci.yml, and push. In two minutes you will have your first green tick.
New posts every day on DevDojo
Practical guides on AI, frontend, backend and DevOps — written for real developers. Bookmark devdojo.co.in and come back tomorrow, or drop your CI questions in the comments below.